Creating Your First Mission
Intro
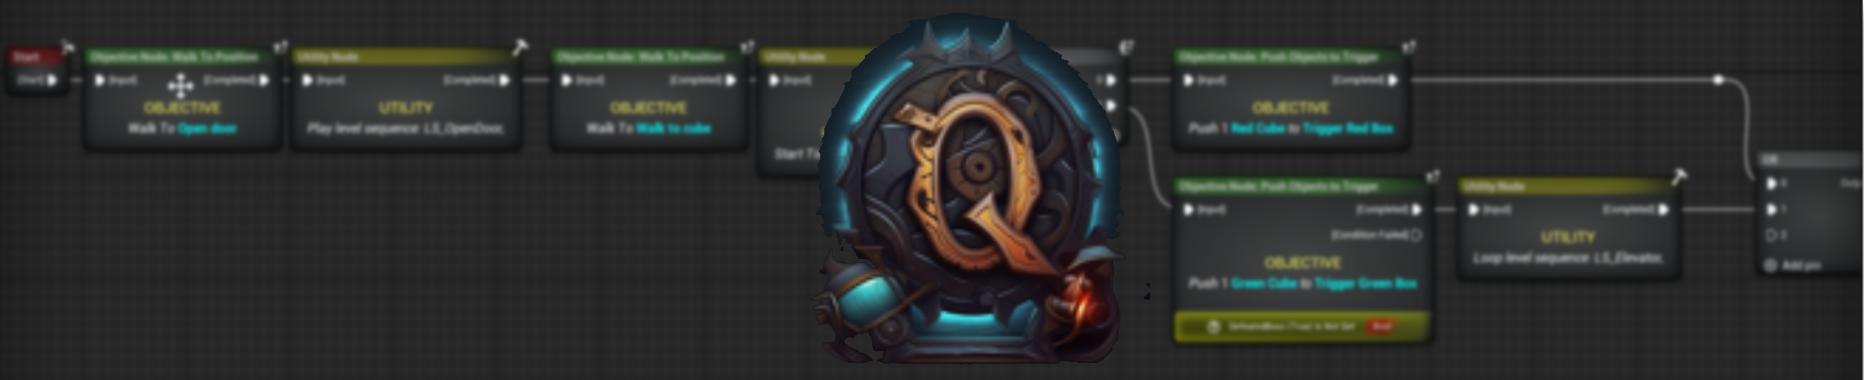
In this step-by-step tutorial, you will create a basic mission with QADE. By the end of the tutorial, you will have a simple mission which you can play from start to finish by walking from 1 point to another like in the preview below.
In this tutorial you will learn all the basics of mission creation in QADE:
- Using the graph to create missions.
- How to setup objectives & utilities inside the graph.
- How to setup your mission inside the level.
- How to start your mission using the Mission Subsystem.
Creating a Mission Graph
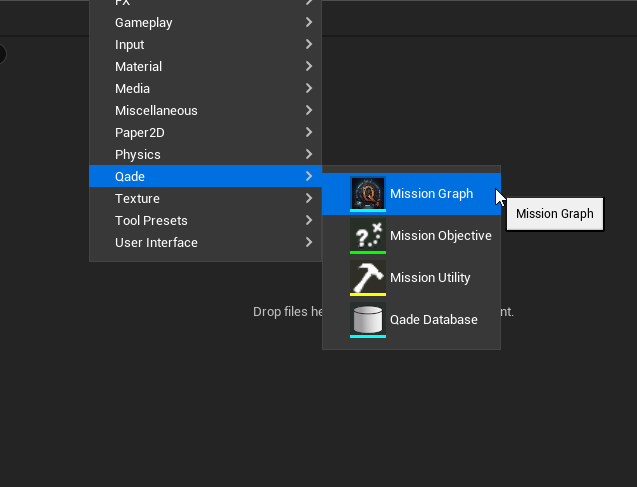
To create a new graph you Right click on a empty spot in the unreal content browser and select the mission graph from the Qade Section.
Your First Mission Graph
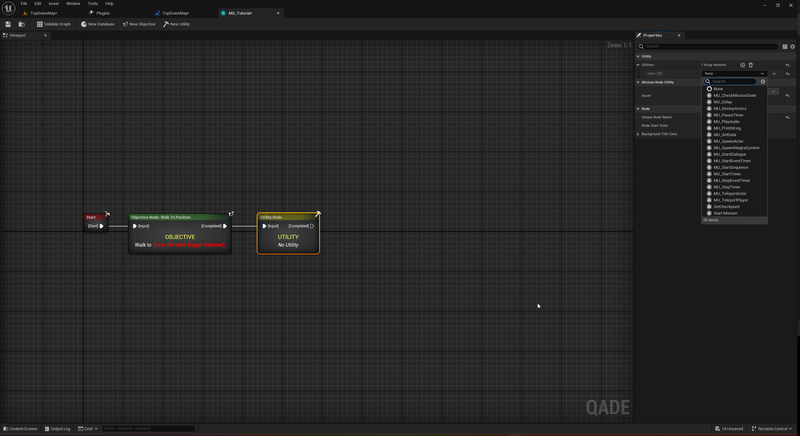
Once you have opened your newly created mission graph asset you will be met with the graph editor. Now that you have the editor open you should see a start node in the graph, this is where you will start with creating your mission.
Adding Nodes
You can create a new node by right clicking anywhere in the graph or by dragging out from a node just like in blueprints. In the context menu you will see various nodes. This is because the plugin comes with several example objectives and utilities.

All the premade example objectives and utilities are normal objective/utility nodes but with example objectives and utilities already applied to them.
Adding Objectives
For now we will just add the base Objective Node to our graph. Once we have the node connected to our start node we will set a objective on the node by clicking on it and then in the details panel on the right side we will select the walk to position objective as we want the player to walk to a specific trigger box for this mission.
Objective Settings
Once you have added the objective you can also change it’s game display text in the defaults panel this will be the text that can show up in your current objective HUD UI element (if you decide to show that to the player).

For now you can leave the walk to position variable on None as we will get back to this later on in the tutorial.
Utilities
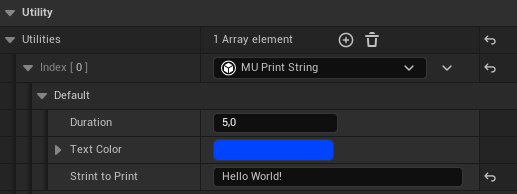
Utility nodes can be used to add logic outside of our player objectives to a mission, things such as teleporting, playing a cinematic sequence, actor spawning and a lot more. Now we will add a utility node to our graph behind the walk to position objective. Utility nodes can have more than 1 event on a node so you can combine multiple events to create more complex mission logic. For now we will simply add a print string event for our test.
Once you have added the print string event you can then change the text, duration and color from the details panel to your liking.
Mission Flow
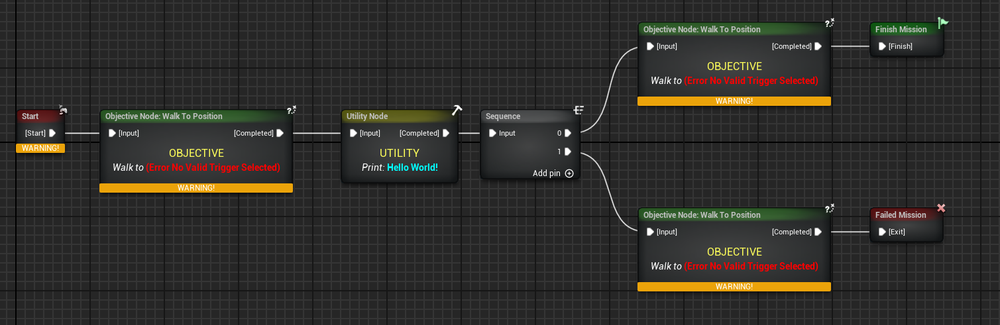
In QADE we also have flow/conditional nodes, you might already be familiar with some of these as they also exist in Blueprints. Think of the Sequence node, AND node, OR node. For the next step in our mission we will add a Sequence node with two outputs and add two more walk to position objective nodes, one for each output pin. After you have the nodes add a fail node to one of the objectives and a finish node to the other.
Once you have done this the graph should look similar to the screenshot below.
At this point your mission design is complete all we need to do now is to add triggers to our level and assign them to the nodes. We will continue doing that in the next segment.
Mission Level Setup
Now that you have your mission graph made, you will need to assign actors to the objectives. To do this you will need to add them to your level. In this case you will need Qade Triggers that can be found in Unreal’s Quick Add menu, under the Qade category.
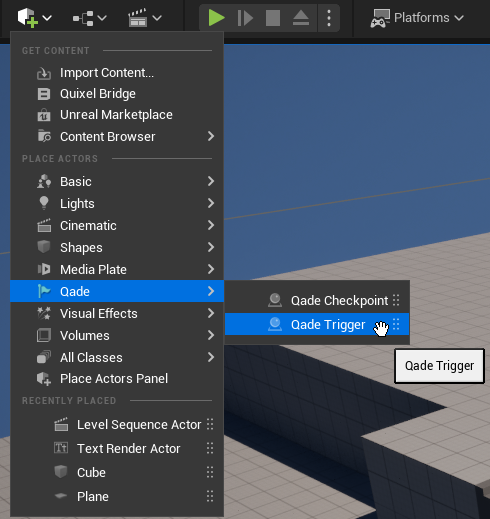
Make sure to place 3 Qade trigger in your level at different location but make sure to keep the graph flow in mind.
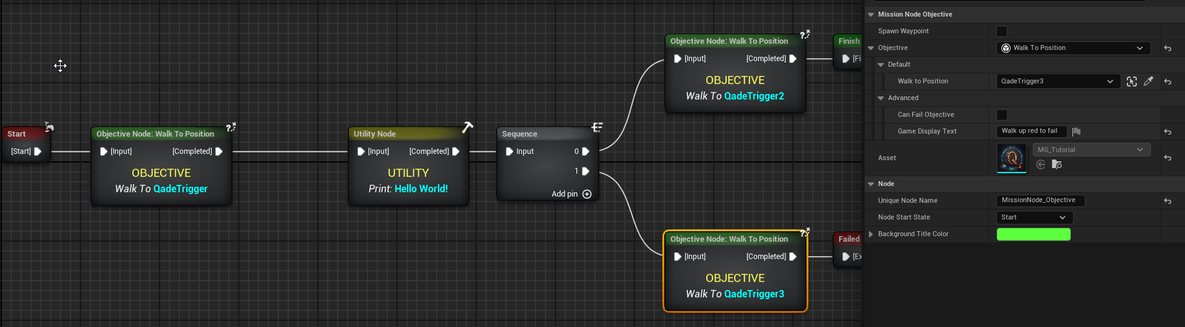
Once you have placed your triggers, you can go back into the graph and click on the objective nodes to view their details panel. Once in the details panel there should be an variable called walk to position where you can assign a trigger from the level.
Currently we use soft references for our example objectives, which means you can easily select an actor from the level but only from the level where the mission gets used.
Congrats you now have a complete mission. In the next section we will tell you how to start your new mission.
Mission Level Setup
There are two different ways you can use to start your mission.
First, you can use our premade RunGraph blueprint which can be found in the plugin content folder.
Secondly, you can start it from any other blueprint through the Mission Subsystem, here you can just get the subsystem and call StartMission.
Example HUD
After starting your mission you might have noticed that there is no UI. For now to test your mission you can add the example UI from the plugin which is called WI_ExampleHud to your player on BeginPlay.