Creating Your First Dialogue
Intro
In this step-by-step tutorial, you will create a basic dialogue with QADE. By the end of the tutorial, you will have simple dialogue where you can talk to a npc, that talks back based on your response.
In this tutorial you will learn all the basics of dialogue creation with QADE.
- Using the graph to create Dialogue.
- How to setup response and player response nodes.
- How to setup your Dialogue inside the level.
- How to start your mission using the Dialogue Subsystem.
Creating a Dialogue Graph
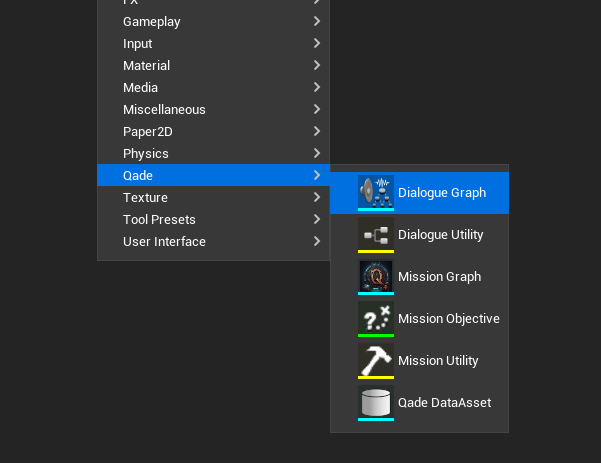
To create a new graph you Right click on a empty spot in the unreal content browser and select the Dialogue Graph from the Qade Section.
Your First Dialogue Graph
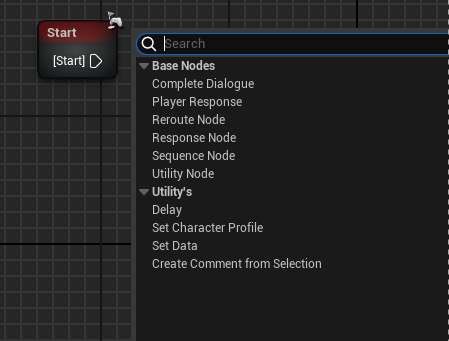
Once you have opened your newly created Dialogue Graph asset you will be met with the graph editor. Now that you have the editor open you should see a start node in the graph, this is where you will start with creating your Dialogue.
Adding Nodes
You can create a new node by right clicking anywhere in the graph or by dragging out from a node just like in blueprints. In the context menu you will see various nodes. This is because the plugin comes with several example utilities and the default set of flow and dialogue nodes.
All the utility options in the menu are just the base utility nodes but with preset utility events set on them.
Response Node
For now we will start by adding a Response Node to our graph. Once we have the node connected to our start node we will modify the node by clicking on it. Then in the details panel on the right side we will select a character profile (To learn how to make those See: Creating Character Profiles).
Once you have added the profile we can alter the settings from the Response Node.
For more information about the Response go to the Dialogue Responses page. As for now we will fill in some values to get the first response node up and running.
Here, we will setup the following dialogue settings:
- Enable Manual Dialogue. (As for now we are not using subtitles or audio).
- Fill in text that you would like to see in the dialogue array.

Player Response Node
The only difference between the Player Response and Response node is the extra variable called Player Choice. This will be the text that will be displayed when making a decision on what to say.

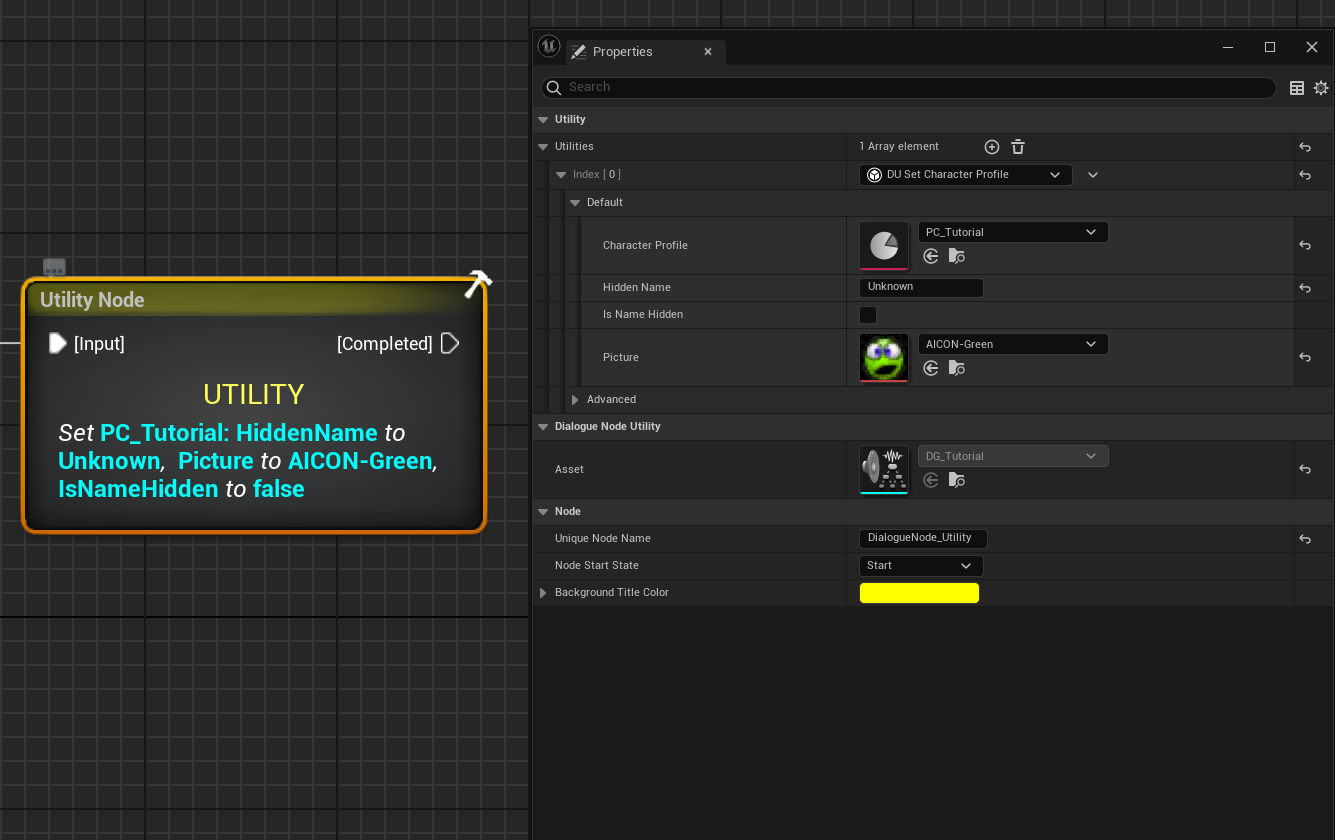
Utilities
Utility nodes can be used to add logic outside of our dialogue content. Things such as hidding the character profile names, adding a delay, and more. Now we will add an utility node to our graph that unhides the character profiles name.
Dialogue Utilities and Mission Utilities work in a similar way but are considered different nodes meaning that dialogue utilities will not work in mission graphs and vice versa.
Dialogue Flow
In QADE we also have flow/conditional nodes, you might already be familiar with some of these as they also exist in Blueprints. Think of the Sequence node, AND node, OR node. For the next step of our dialogue, we will add a Sequence node with two outputs and add two Player response nodes, one for each output pin. After that we will add responses from Smiley. Once you are done with that, you will have to connect the last nodes one or more complete dialogue node(s).
After all of this you should have a graph that should look similar to the screenshot below.
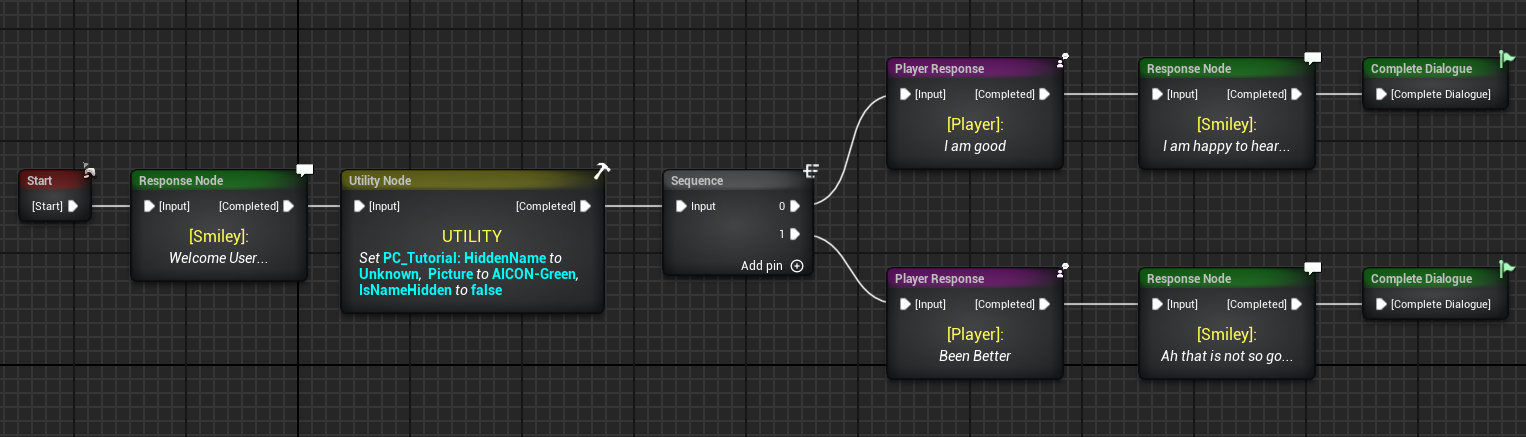
At this point your dialogue is complete all we need to do is set up the example widget for the dialogue. in the Example Level of Qade. you can find how we bound all the events and how it works. After that we only have to start the dialogue by walking into a trigger.
Dialogue UI Setup
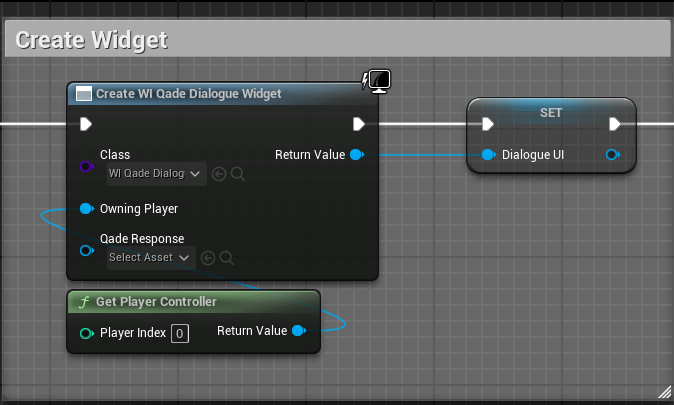
Officially for your own game you, will want to create your own dialogue widget but for now to quickly test if it all works you will need to do 3 things:
- On BeginPlay either in the level blueprint or player blueprint create the QADE dialogue widget and save it to a variable.
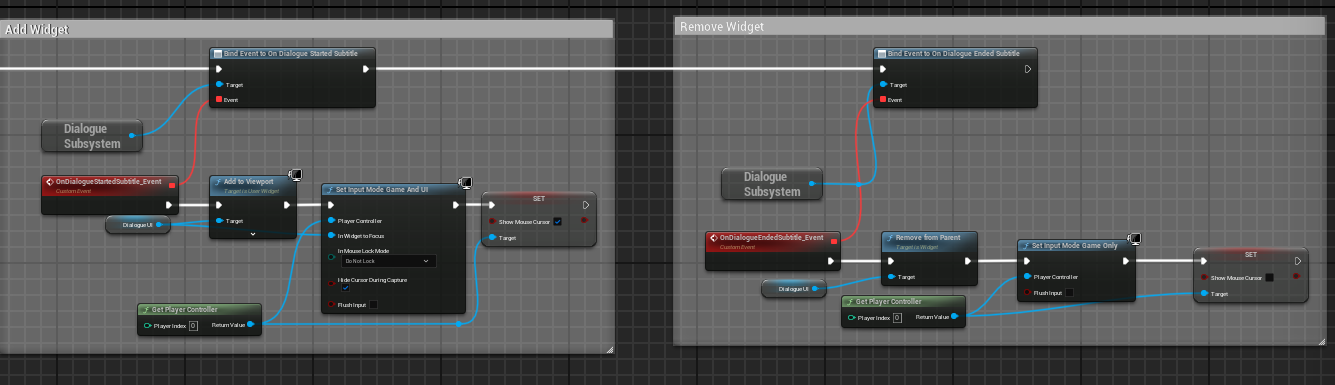
- Get the dialogue subsystem and from there bind to the OnDialogueStarted Event and add the widget variable to the viewport.
- Get the dialogue subsystem again and from therea bind to the OnDialogueEnded Event and remove the widget from parent.
Start your Dialogue
To start your dialogue you can call the StartDialogue Function from the Dialogue subsystem, you can call this when entering a trigger box or use your own interaction system to start it or on begin play if you want to do a quick test.