Creating Character Profiles

Intro
On this page you will learn how to create and setup a character profile for the characters in your game.
Creating a Basic Character Profile
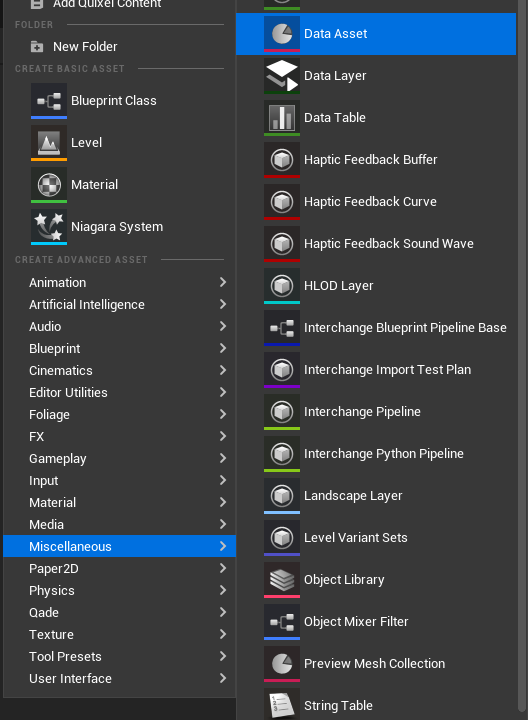
To create a character profile start by opening up the content browser, Once open right click in an empty spot in the content browser. Then go to Miscellaneous and select Data Asset.

Once you have clicked on the data asset, a new menu will open up. Here you can select what type of data asset class you want it to be. Here you will want to search for BP_QadeCharacterProfile and choose that as the class to use for the data asset.

BP_QadeCharacterProfile is an example profile and comes with extra data, Look at Creating Custom Profiles for creating your own profile data asset.
Now you should have a character profile asset that you can open.
Setting up the Basic character profile
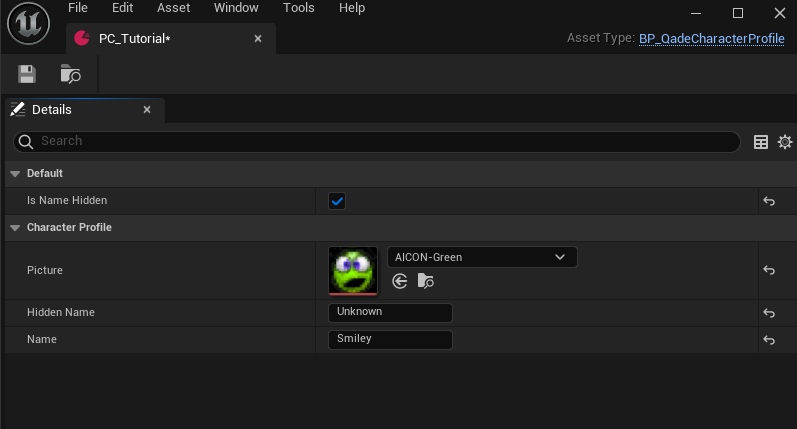
Now that you have the asset, you can open it. This will show you a menu with the following settings:
Default Setting from the Base class
- Name: The actual name of the character, change this to what your character is going to be called.
Example Settings
- Hidden Name: This is a fake name that can be used when the IsNameHidden settings is enabled.
- IsNameHidden: A setting that enables the Hidden Name instead of the normal Name.
- Picture: A Profile picture of the character that can be used in dialogue or other UI.

Creating Custom Profiles
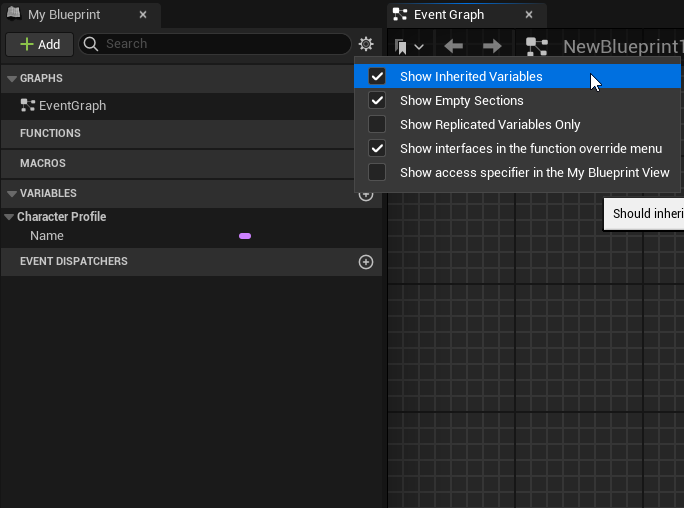
To create a custom character profile with your own data for your game, you will need to create a new data asset class derived from QadeCharacterProfile. This will give you a blueprint with only a Name variable. If you don't see it make sure that Show Inherited Variables is enabled.

Here you can add your own custom variables just like in normal Unreal Blueprints. Once you have added the data that you want do the same thing as in the Creating a Basic Character Profile Step but use your custom data asset in the class selection menu instead of the example one.